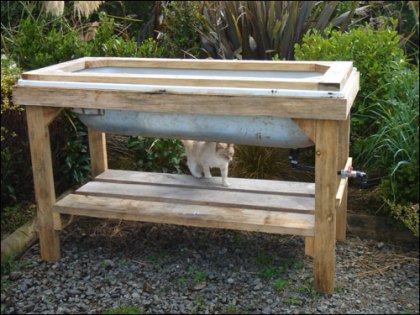
We’ve wanted a proper worm farm for ages but it wasn’t until we spotted an old bath pretending to be a water trough at Nic and Lou’s place that I put in the effort to make one. I had some left over 40mm thick pine from the stables fit out and scrounged a few left over plumbing fittings from the shed so we only had to spend a few dollars on the Tiger worms.
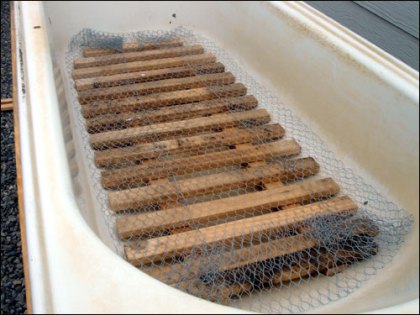
Wooden slats provide the base for the drainage system, otherwise the worms will drown if too much liquid builds up. You want the liquid to drain out but not the dirt.
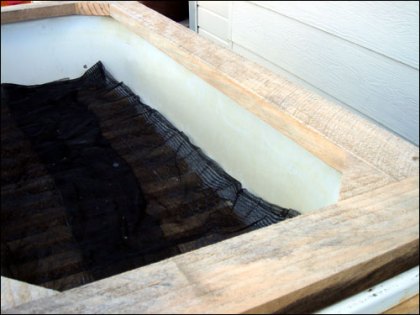
Some chicken wire squashed in the bottom provides support for the last layer – shade cloth.
The wooden edge extends over the lip of the bath to stop the worms escaping. Otherwise, on dark, wet nights they can mass-migrate.
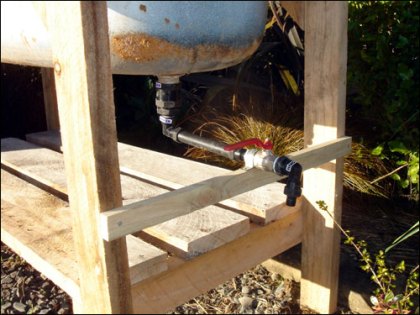
Using the bath drain we can let the liquids out – worm tea (as it’s euphemistically named) makes great fertiliser!
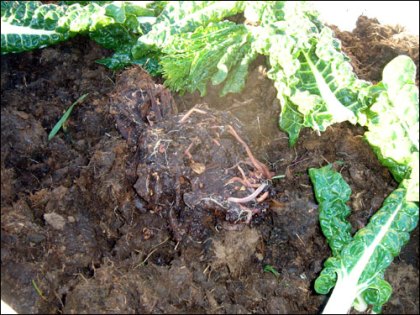
Here are the wee guys in their new home – a bath full of rotted horse manure. The next step is to build a lid to shade them from the sun and heavy rain.
20 Comments so far
Leave a comment

Right – finally found a use for the old concrete tubs from the laundry ex-renovations… The boys will LOVE having pet worms, you’re probably in trouble with the wife though ’cause worms are yuk. Can anyone point me to a worm supplier in Auckland or should I stage a midnight raid on my parents existing worm farm for some breeding stock 😉
Comment by Rob November 19, 2008 @ 11:58 amThese guys mail order worms http://www.worms.co.nz/ sorted 🙂
Comment by John November 19, 2008 @ 7:03 pm[…] Lifeboat Farm DIY Worm Farm […]
Pingback by Bathtub to DIY worm farm » Developages - Development and Technology Blog December 18, 2008 @ 2:31 pmThe one problem about reusing old bathtubs like this is that many will have lead glazes. Make sure you test for this before attempting a reuse, unless you like elevated lead levels in your brain tissues.
Comment by Shelby December 19, 2008 @ 3:36 amFreakin’ genius!
Comment by Eva December 19, 2008 @ 4:38 pmjust…WOW!!!
Comment by Laura December 22, 2008 @ 6:28 amIf I manage to lay hands on my mothers old yard-tube..this comming summer will be Wormastic!
[…] digging this DIY worm farm made from an old […]
Pingback by my aim is true » Blog Archive » Friday Link Dump! February 7, 2009 @ 6:01 am[…] He has a great blog, full of lots of good practical garden info – he recently posted about this DIY worm farm made from an old bathtub, really a nice […]
Pingback by The Genteel Recessionista » Bathtub worm bin February 28, 2009 @ 9:05 amwill they eat the worms .. The lead is only a problem is you mess with it? like scratch it to the point of powder,and make liquid. Shelby why would you deter people from using a Product so very large and deemed un-use-able yet the animals
all along were drinking from the very tubs,sinks and so on,as well as becoming bird baths and for festering misquito (sp) larve’ would be a much better situation?! I say go for it! FISH ON! YEA!!!!!!
Stop putting a damper on a good idea!
Comment by outside March 1, 2009 @ 11:17 amThis is the answer I was looking for ,I have a tub in my yard and I wanted to do something nice…I got it now. Thanks from Connecticut.
Comment by Lydia Cruz March 29, 2009 @ 4:08 pmI’ve been wanting to start a small worm farm as my husband and I are avid fisher people. What a PERFECT idea. Especially since were getting ready to remodel a bathroom and replace the tub. Thanks for sharing this wonderful idea!
Comment by Becki April 2, 2009 @ 6:19 aml just built one of these following your instructions here, l understand how the liquid is collected at the bottom, but is there a way of collecting the castings. What did you use for a cover? l am up to the stage of filling it, do l use compost dirt and grass clippings and food waste products then add the worms?What happens when the worms out grow the bath or do they, l wont be able to add another layer, therefore how do you collect the castings..? sorry about all the questions, appreciate your reply..
Comment by Michele May 25, 2009 @ 3:06 pmMichele. To answer your questions – the worms will only breed to the limit of the bath and/or the food supplies available to support the worms. I suggest when you want to use the castings, place all the worm food to one side of the bath. wait a week and then the worms will migrate to that side and you will be able to take the castings from the other without losing to many worms.
Comment by russ September 10, 2009 @ 6:11 pmto michele,if bath gets too fill you could just turn it inot a rasied garden bed and plant veges in the bath..thats what i’m going to do…i’ve put coir,compost,bark,and sheep pellet manure into it,and will be adding food scraps also…and worms..hope it works…;-)
Comment by kumeunz October 7, 2009 @ 9:50 pm[…] at LifeBoat Farm they have created this great DIY Worm Farm out of an old bathtub. What I like about this build is they could have easily taken the bathtub propped it up on […]
Pingback by Make a worm bin out of a bath tub - The Cheap Vegetable Gardener January 11, 2010 @ 5:08 amHey guys,
Great work! was just wondering what you used to put on top of it to cover it up? If I use a metal tub from a laundry should I avoid putting it in full sun. I’m in Perth, Australia and we get pretty damn hot days here during summer . . wouldn’t this be too hot for the little worms to live in? Any advice would be appreciated . . 🙂 once again nice work.
Alexis
Comment by Alexis April 10, 2010 @ 1:19 amThanks Alexis. We use a piece of thick carpet as a cover – it still lets the rain through but keeps the moisture from evaporating. You might have to add water every now and then if you don’t get enough rain.
Comment by John April 15, 2010 @ 9:25 amI was thinking of burying my cast iron tub about 2/3 into the ground. We live in Canada where the winters are cold. Would this help with insulation?
Comment by Shirley June 20, 2010 @ 9:17 amHello,
Thanks for posting this information which I consulted before building my worm farm:
Mine is not nearly as fancy as your one, a bit rough and ready, but hopefully it will do the job. Comments/suggestions appreciated.
Regards,
Comment by Aidan July 13, 2010 @ 3:40 pmAidan in Nelson
Thanks for the idea of shade cloth! I have lots of that hanging around, and I do not like the idea of buying landscapers cloth when I can reuse something.
Comment by Jason December 8, 2011 @ 4:35 pm